For several weeks, there had been ice accumulating at the bottom of the freezer side of our Maytag side-by-side refrigerator. This required the occasional task of breaking up and disposing of the ice at the bottom of the freezer. Once, I left it so long that it froze the bottom removable rack, requiring a lengthy chiseling operation to break it free. It was time for a permanent fix.
Luckily, this appears to be a common problem. A quick Google search revealed that it was likely a clogged drain. My first thought was “What! My fridge has a drain???”. Sure enough, it does. Though it isn’t like the drain in your kitchen sink or dishwasher.
In order to see what this drain looked like, I pulled out the fridge and opened up the back.

I used a small ratchet and mini socket to remove all the screws.

Looks like it could use a good cleaning.

Here is the location of the actual drain from the freezer. Notice that it takes an immediate 90 degree bend, so don't try unclogging it by jamming a sharp object down the drain. You'll end up punching a hole in your drain line.

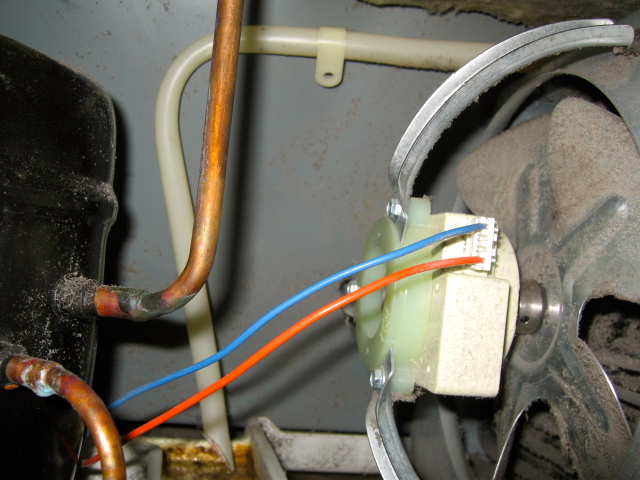
This is the other side of that drain tube. It actually drains to a little moat-like collection container which surrounds the fridge motor. So the entire process is like a miniature eco-system. Warm air is cooled in the freezer, causing the moisture to condense into water, which drains to this collection chamber where the heat from the motor evaporates the water.
So on to the repair: First, turn off the fridge and clear out the freezer. If you don’t have another freezer, you’ll need to pack it into coolers.
There are 2 screws which I removed with the same ratchet and socket that I used for the back of the fridge. With the screws removed, pull back the top panel just enough to release the bottom panel. Then pull the panel upward to remove.

Here is a close-up of the clogged frozen drain.

Now, it’s just a matter of breaking up the ice, and ensuring that the drain is clear by running hot water through it.
After you have cleared the drain, re-assemble and turn the fridge back on. All should be back to normal now.
UPDATE:
After having to do this repair a second time, I took a closer look at the drain hose at the back of the fridge.

Notice that the horizontal portion of the hose is fastened to the top, forcing the water to travel slightly upward. Well, water doesn't tend to flow upward very easily. As a result, the water will pool inside the hose and eventually backlog into the freezer.
To remedy this situation, unscrew the fastener for the hose, then cut of the bottom inch or so off the end of the hose with a pair of garden snips. Then just let it hang as in this photo or secure it with some duct tape. Resist screwing it into the side of the fridge as you're likely to put a hole in the produce section of the fridge.
Also, use a q-tip to remove any debris that may have accumulated in the drain hole. When pouring water down the drain, it should flow unimpeded. Be careful not to overflow your water collection pan. If you pour more than a couple cups of water down the drain, you should collect it by soaking it up with a chamois or "ShamWow" at the back of the fridge.
Hopefully, this will prevent having to do this repair in the future.
 Subscribe